
| Home | As it was page | Disassembly 1 | Disassembly 2 | Body Work 1 | Body Work 2 | Misc | 2011 Progress | Back at it! | 2015 | 2016, 2017, 2018, 2019, 2020 |
On the last page I showed you some pictures of the frame restoration, before and after, the body coming off of the frame and the cleaning, painting and re-assembly of the frame, suspension components, engine and radiator support back together.Now I will take you through the restoration of the underbody, priming and painting the floor pans, trunk lid, firewall and jams.
|
|
|
|
|
The more I look at the progression of pictures throughout the restoration process the more I feel I made the right decision to separate the frame and body and do it right.
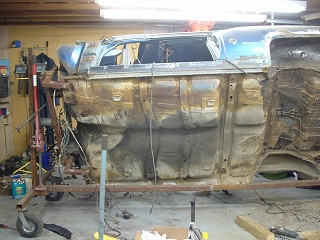
You can see in the first picture the shape of the floor pans from the bottom side of the car. Covered with scale and old undercoating really looked pretty bad. Although the floor pans were in very solid shape there were some pin holes in the sheet metal that I filled prior to priming and painting. It still took several hours of scrapping with a heat gun and putty knife to remove the undercoating. After I removed the undercoating I used my angle grinder and wire wheel to remove the scale and dirt to get down to the bare sheet metal.
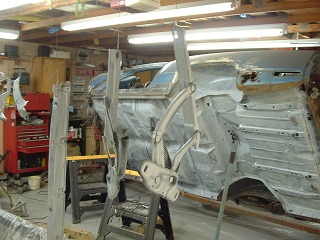
I think you can tell from the pictures above that the body is now attached to a rotisserie. I would like to thank Dean Lewis of Southern Illinois Muscle Cars for the use of the rotisserie, the only thing it cost me was a coat of paint when I was done.
|

|
|
|
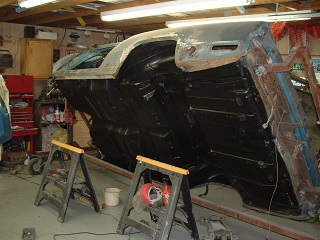
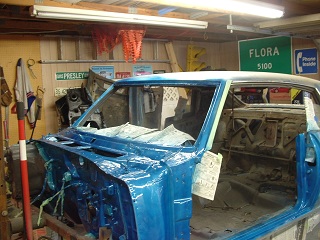
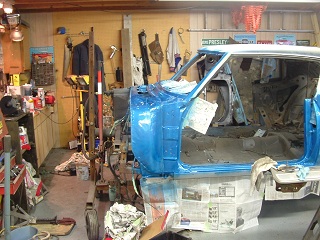
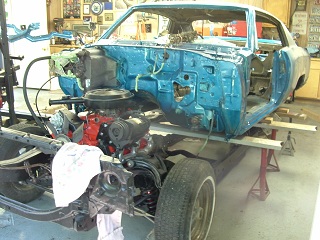
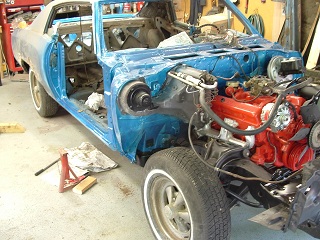
The firewall is now cleaned, prepared and primed, along with the jams around the doors and trunk lid opening. It is starting to look better, at this time I had purchased some single stage paint to the exact GM 26 color code.
The GM 26 color, (Blue Poly now, Bright Blue Metalic then), looks good and matches the original color as far as I can remember. It is really kind of exciting to see what the car will look like with color even if it is just a small area that will not be seen in normal opeation.
|
|
|
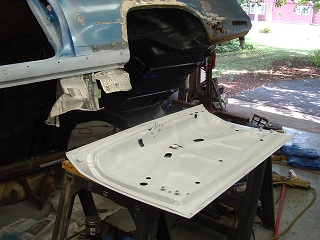
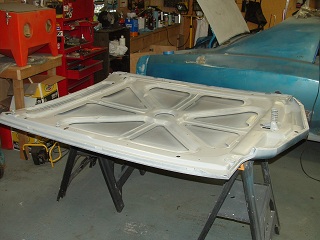
Before I showed you a picture, during disassembly, of the rear of the car and the trunk lid. The trunk lid had been replaced at one time or anouther with a lid from a yellow car with a quick respray on the inside. The paint was peeling and needed to be addressed, (it would need addressed anyway even if it wasn't peeling).
After stripping all of the 'new' blue paint and 'old' yellow paint I primed the underside of the trunk lid. Again I used the single stage GM 26 color code paint used on the jams and firewall to finish the inside of the trunk lid. A little bit of assembly and gap adjustment and it looks pretty good.
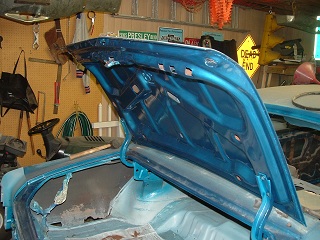
After the trunklid was complete and assembled I turned my attention to the hood. If anyone has worked on an early '70's GM vehicle or even remember opening the hood you know how heavy and bulky they are. It was all I could do to get the hood on the sawhorses to work on it.
I first had to remove the hood insulation pad and about, (not really but felt like), 500 retainer clips. The pad was in such bad shape it just crumbled in my hands during disassembly. To slick things up a bit I ground away the excess bonding adhesive used to bond the hood braces to the outer skin. This way I can leave the hood pad off and it would still look decent. Probably will install a new hood pad just to keep the engine heat away from the painted surface of the hood.
|
|
|
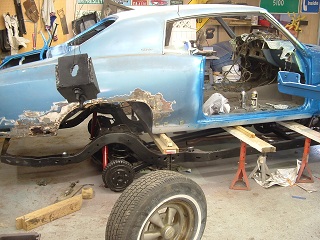
The body and frame are ready to meet again after a long cold winter of being apart. I had to take it off of the rotesserie in order to get the frame back in position under the suspended body so I again got out the floor jack, jack stands and 2 x 6's and very carefully got the body as high as possible without dumping the whole thing on the garage floor.
With the new body bushings and bolts in place myself and 4 other of my friends slowy lowered the body, corner by corner, left to right until we got to the minimum height of the jack stands. Two of the bigger guys positioned themselves at the trunk and pivoted the body on the rear 2 x 6 so I could remove the front 2 x 6 and jack stands. We then lowered the front of the body on the frame rails. Believe it or not with very little adjustment the bushings lined up and I could get a few threads on the bolts. We then lifted the rear of the body, removed the other two 2 x 6's and jack stands and lowered the rear of the body on the frame. Again with just a little adjustment the bolts lined up and I could start the bolts. Everyone stayed while I lined up the rest of the body bolts and bushings and until we were all satisfied we were straight and level. Everything took only about 1.5 hours to get the body bolted back to the frame. We did the assembly on July 7, 2007, (7-7-07), wonder if that had anything do with it?
BODY WORK IS NEXT.
WEB DESIGN BY
The Genthe Group
![]()
330 East 6th St.
Flora, Illinois 62839
618 676 7732
| Home | As it was page | Disassembly 1 | Disassembly 2 | Body Work 1 | Body Work 2 | Misc | 2011 Progress | Back at it! | 2015 | 2016, 2017, 2018, 2019, 2020 |
| Clay County Cruisers Car Club |
| Eastwood Restoration Supplies |
| Goodmark Industries |
| Hemmings Motor News |
| Year One |